Cinematic drone shots bring your aerial videos to life, offering stunning visuals that rival Hollywood productions. Whether you're an experienced pilot aiming to up your game or a content creator seeking professional footage, this guide breaks down key cinematic manoeuvres, camera settings, and post-production tips with clear instructions to help you achieve breathtaking results:
1. Essential Cinematic Drone Maneuvers (How to Do Them)
1.1 Orbit Shots
What is it? An orbit shot is when the drone flies in a circular path around a subject, keeping it perfectly centered in the frame.
How to Perform an Orbit Shot:
- Choose your subject (e.g., a tree, building, or person).
- Position your drone at a safe altitude and distance.
- Activate the drone's "Point of Interest" (POI) mode if available (found in DJI Fly or similar apps).
- Use the left stick (yaw) to rotate the drone left or right while gently using the right stick (roll) to move sideways.
- Adjust your speed and camera tilt as you orbit to keep the subject framed beautifully.
Pro Tip: Use slow, consistent movements for a smoother shot. Try ND filters to control exposure and maintain cinematic motion blur.
1.2 Dolly Zoom (Vertigo Effect)
What is it? A dramatic shot where the background appears to zoom in/out while the subject remains the same size.
How to Perform a Dolly Zoom:
- Fly your drone toward or away from the subject in a straight line.
- Simultaneously use your camera's zoom feature (if available) in the opposite direction:
- If flying forward → Zoom out.
- If flying backward → Zoom in.
- Practice at a slow pace to ensure precision and smooth control.
Pro Tip: Use drones like the DJI Air 3 or Mavic 3 Pro with optical zoom for best results. If your drone lacks zoom, replicate the effect in post-production by key-framing a zoom-in.
1.3 Parallax Movement
What is it? A shot where the foreground moves faster than the background, creating a sense of depth.
How to Perform a Parallax Shot:
- Find a scene with foreground objects (e.g., trees, posts) and a distant background (e.g., mountains).
- Position your drone at a low altitude, ensuring some foreground objects are in view.
- Move the drone laterally (roll left/right) while keeping the camera focused on the background.
- Fly slowly to exaggerate the parallax effect.
Pro Tip: Set your camera’s frame rate to 60fps and slow it down in post-production for smoother results.
2. Camera Settings for Cinematic Quality (How to Adjust Them)
2.1 Set Your Frame Rate and Resolution
- For cinematic shots, use 24 fps for a natural, film-like motion.
- Shoot at 4K resolution to capture sharp, detailed visuals.
How to Adjust:
- Open your drone’s camera settings.
- Select Video Settings > Choose 24fps and 4K resolution.
2.2 Set Shutter Speed and ISO
- Use the 180-degree rule: Shutter speed should be double your frame rate.
- Example: For 24fps, use a shutter speed of 1/50s.
- Keep ISO low (e.g., 100) to reduce noise in bright lighting conditions.
How to Adjust:
- Switch to Manual Mode in your drone's camera settings.
- Adjust the shutter speed to 1/50s.
- Set the ISO to 100 and add ND filters if the shot is too bright.

3. Post-Production Techniques for Cinematic Results
3.1 Stabilizing Footage
- Even with a gimbal, minor vibrations can occur. Use video editing tools like Adobe Premiere Pro or Final Cut Pro to stabilize footage.
How to Stabilize (in Premiere Pro):
- Import your footage into the timeline.
- Go to Effects and search for “Warp Stabilizer.”
- Drag the effect onto your clip and let it analyze.
- Adjust the “Smoothness” setting to fine-tune stabilization.

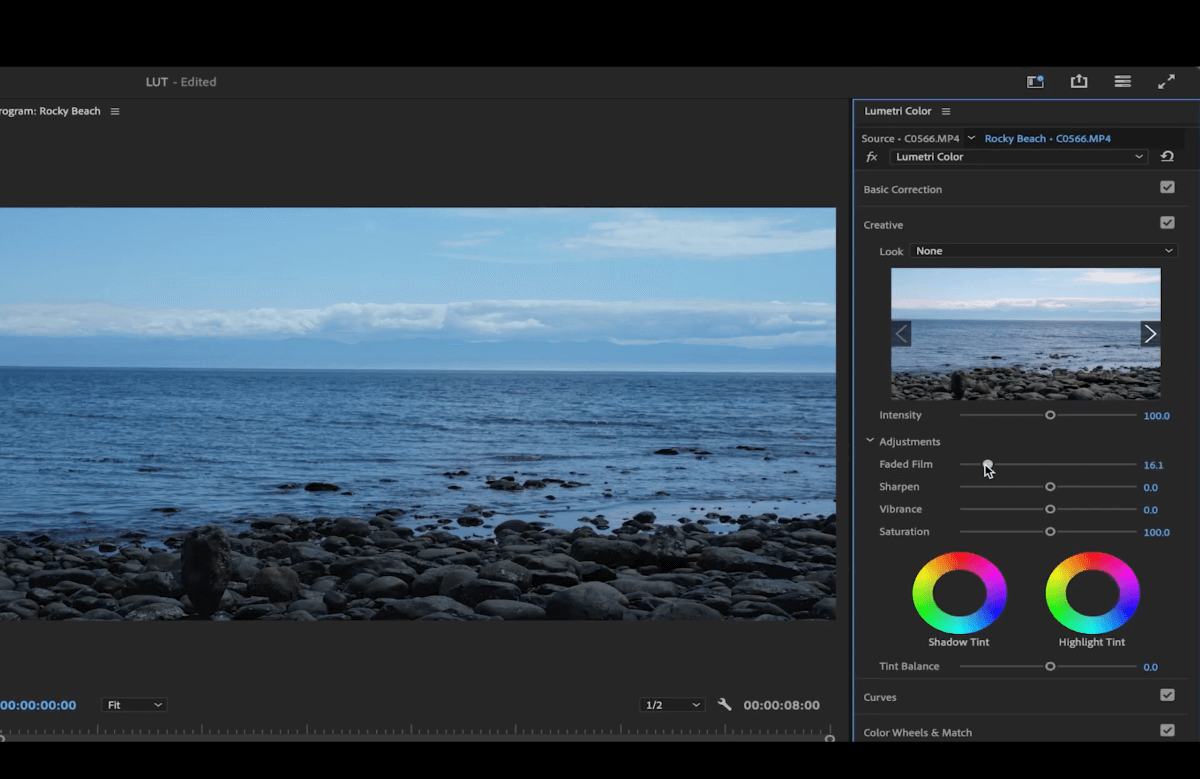
3.2 Color Grading for Cinematic Looks
- Use LUTs (Look-Up Tables) or manually adjust color tones to achieve a dramatic and cohesive look.
How to Apply a LUT:
- Open your footage in Adobe Premiere Pro.
- Go to the Lumetri Color Panel.
- Under “Basic Correction,” click Input LUT and choose a cinematic LUT.
- Adjust sliders for Exposure, Contrast, and Saturation to match your vision.

4. Pro Tips for a Smooth Cinematic Flight
- Plan Your Shots: Use flight-planning apps like DJI Fly’s Waypoints to pre-program your maneuvers.
- Fly in Calm Weather: Wind can destabilize your footage. Early mornings often have the calmest conditions.
- Use ND Filters: Neutral Density filters act like sunglasses for your drone, controlling brightness and enabling slower shutter speeds.
Conclusion
Cinematic drone footage requires precision, planning, and a solid understanding of both flight mechanics and camera settings. By practicing these techniques and incorporating post-production tools, you’ll unlock the full creative potential of your drone.


